Squidstat API User Manual
Loading...
Searching...
No Matches
Running the API with Qt

Introduction

This section is dedicated to guiding developers on building the SquidstatLibrary using Qt Creator. By following the instructions provided here, developers can seamlessly compile and construct the SquidstatLibrary within the Qt Creator IDE. The step-by-step process outlined below will assist developers in setting up the SquidstatLibrary in Qt Creator, allowing them to leverage its functionalities effectively. With the intuitive interface and powerful features of Qt Creator, developers can easily integrate the SquidstatLibrary into their projects, enhancing their ability to analyze and manipulate Squidstat experiment data.

Clone API from Git

  1. To clone the repository, you will need the Git tool. Depending on your platform, you can download the Git tool from this link.
  2. To verify if Git is properly installed, you can follow these steps:
    • Go to your desktop.
    • Open the command prompt.
    • Type git -v and press Enter.
    • If Git is installed correctly, you should see the version information displayed in the terminal.

      git version 2.41.0.windows.1
  3. To create a new directory with a specific name, such as AdmiralAPI, it is recommended to choose a name without spaces.
  4. Click on the newly created directory, AdmiralAPI, and open the command prompt.
  5. To clone the API from the git repository, type the following command in the command prompt and press Enter.

‍ git clone https://github.com/Admiral-Instruments/AdmiralSquidstatAPI

The result in the command prompt will look like this:

Cloning into 'AdmiralSquidstatAPI'...
remote: Enumerating objects: 1846, done.
remote: Counting objects: 100% (508/508), done.
remote: Compressing objects: 100% (159/159), done.
remote: Total 1846 (delta 440), reused 360 (delta 349), pack-reused 1338
Receiving objects: 100% (1846/1846), 79.18 MiB | 10.10 MiB/s, done.
Resolving deltas: 100% (1044/1044), done.

If you check in your directory, you will find a new directory named "AdmiralSquidstatAPI" which contains the Admiral Instruments API.
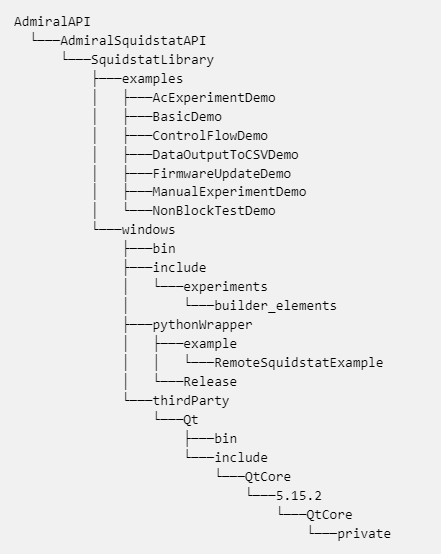
API Bundler Directory Structure

Qt Installation.

  1. Download Qt by clicking here. To compile the API with Qt, it is required to also install the MSVC 64-bit compiler kit on Windows, Dekstop GCC 64bit on Linux, and Clang 64 on Mac during the Qt installation process.
    • Enter your Qt login account information. If you don't have an account, you can sign up and create a new one to proceed with the installation.
    • During the installation process, please ensure that you add at least one of the following components: MSVC2019 64-bit or any MSVC**** 64-bit kit on Windows, Dekstop GCC 64bit on Linux, and Clang 64 on Mac.
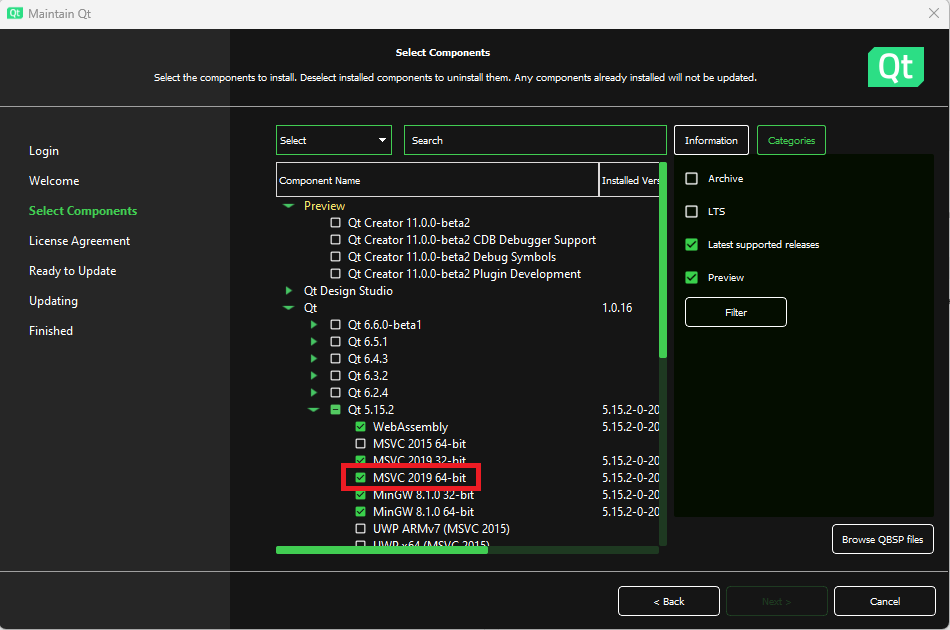
      MSVC kit selection

  2. If you have already installed Qt on your computer but do not have the approritate kit, you can navigate to the Qt installation directory and open MaintenanceTool tool. From there, you can install the appropriate kit by selecting the "Add or remove components" option. However, new Qt users can skip this step.
  3. To utilize the CMakeLists.txt file, you need to install CMake and a build generator such as ninja; otherwise, you will have to manually specify the header file includes and library paths. You can download CMake from here or select CMake, build generator (ninja) in the "Developer and Designer tools" section of the Qt installation process.
  4. Once the installation is complete, you can open the API project.

Open Project with Qt and Cmake

  1. Open Qt Creator and select the File tab. Within the File tab, choose the Open File or Project option.
  2. Select the CMakeLists.txt file located inside the AdmiralSquidstatAPI > SquidstatLibrary directory.

    Top Level Cmakelist file

  3. Once you open the Qt CMakeLists.txt in Qt, it will provide you with the option to select the kit. Choose the MSVC 64-bit kit or appropriate kit w.r.t platform ,and click on "Configure Project."
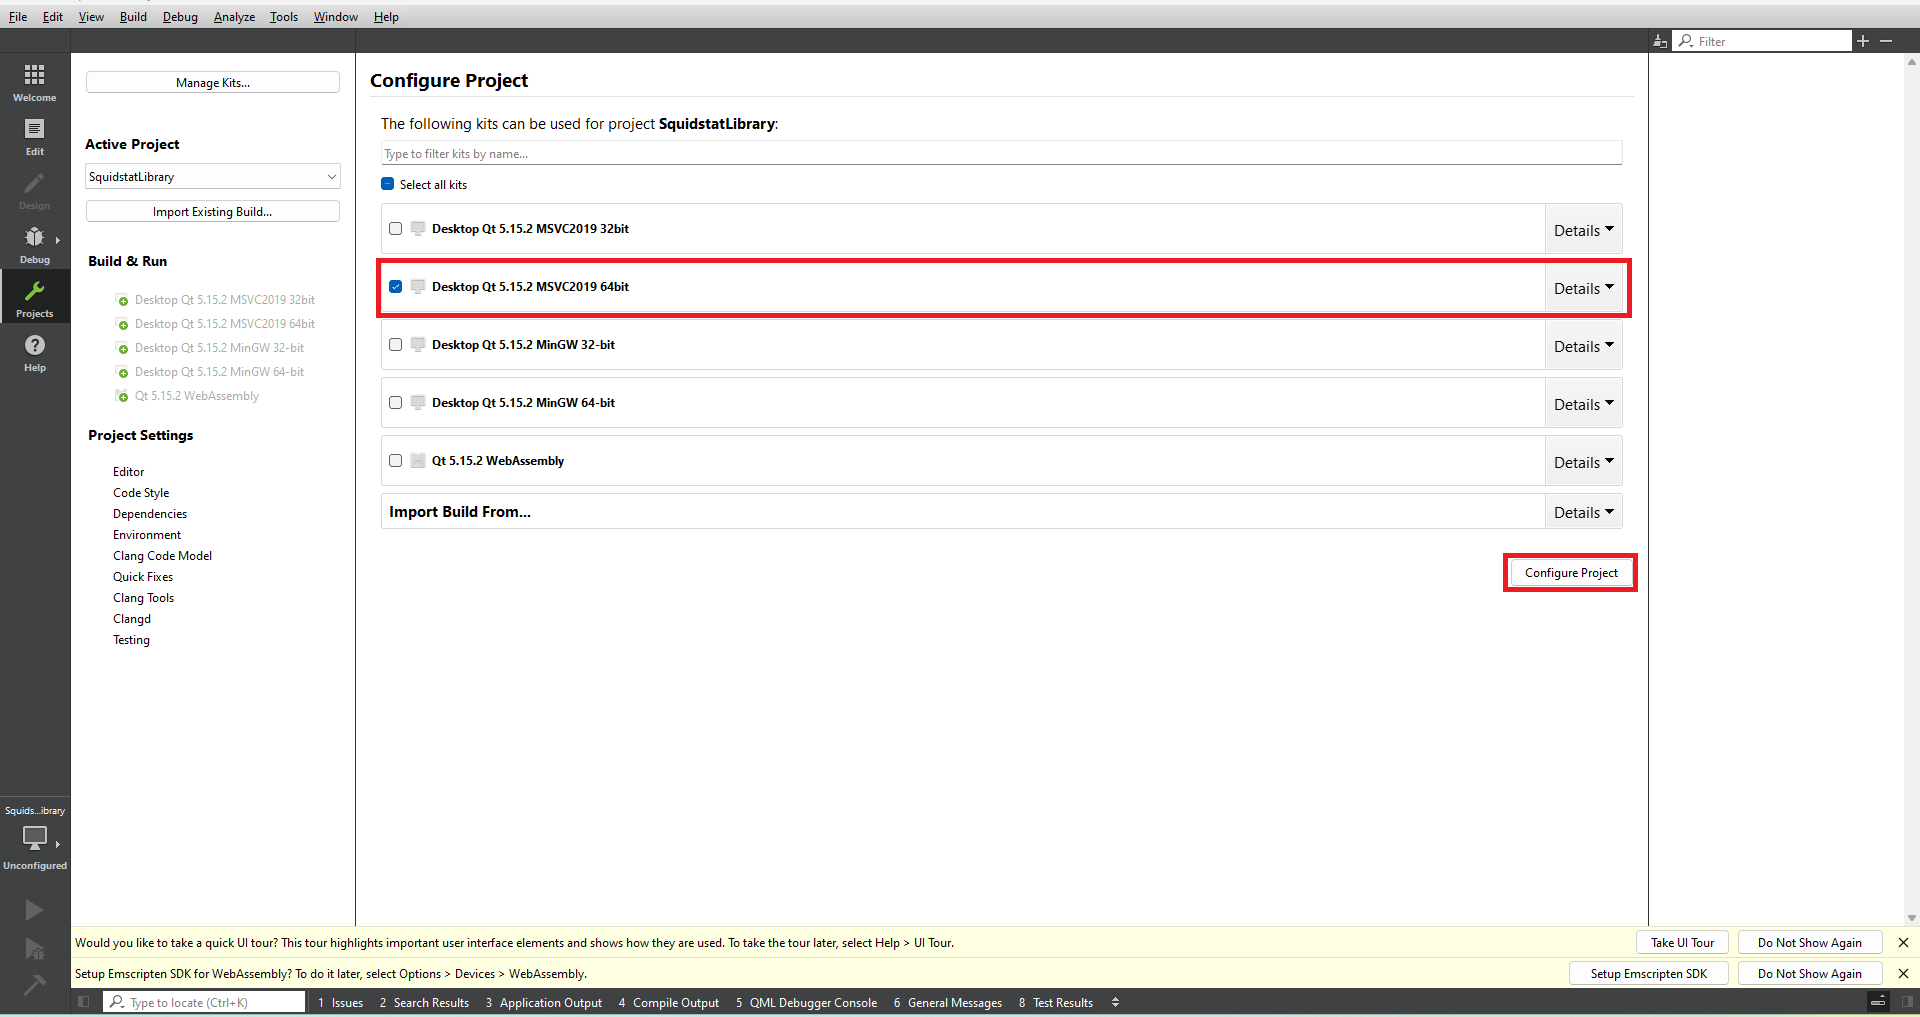
    MSVC kit check mark

  4. You can check the General Message section located in the footer. CMake will automatically configure the project, including the required libraries and header files.
  5. The project solution will look like the image below.
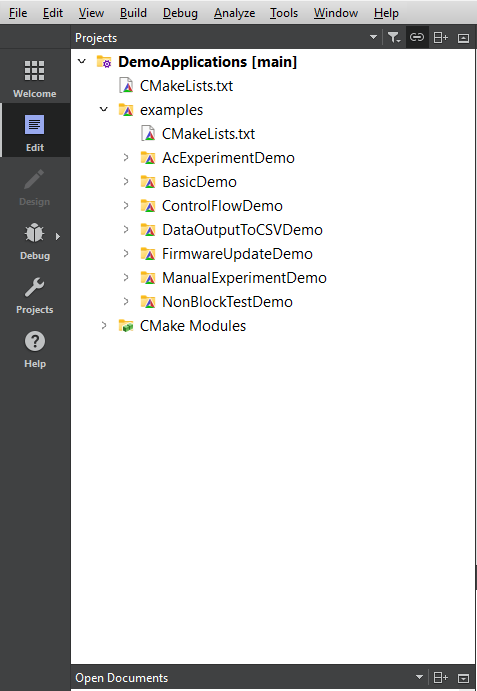
    Qt project solution image

  6. You can select any example from the list. For the purpose of this tutorial, select the "ManualexperimentDemo" project and open the main.cpp file. You are required to change the deviceName and channel number.
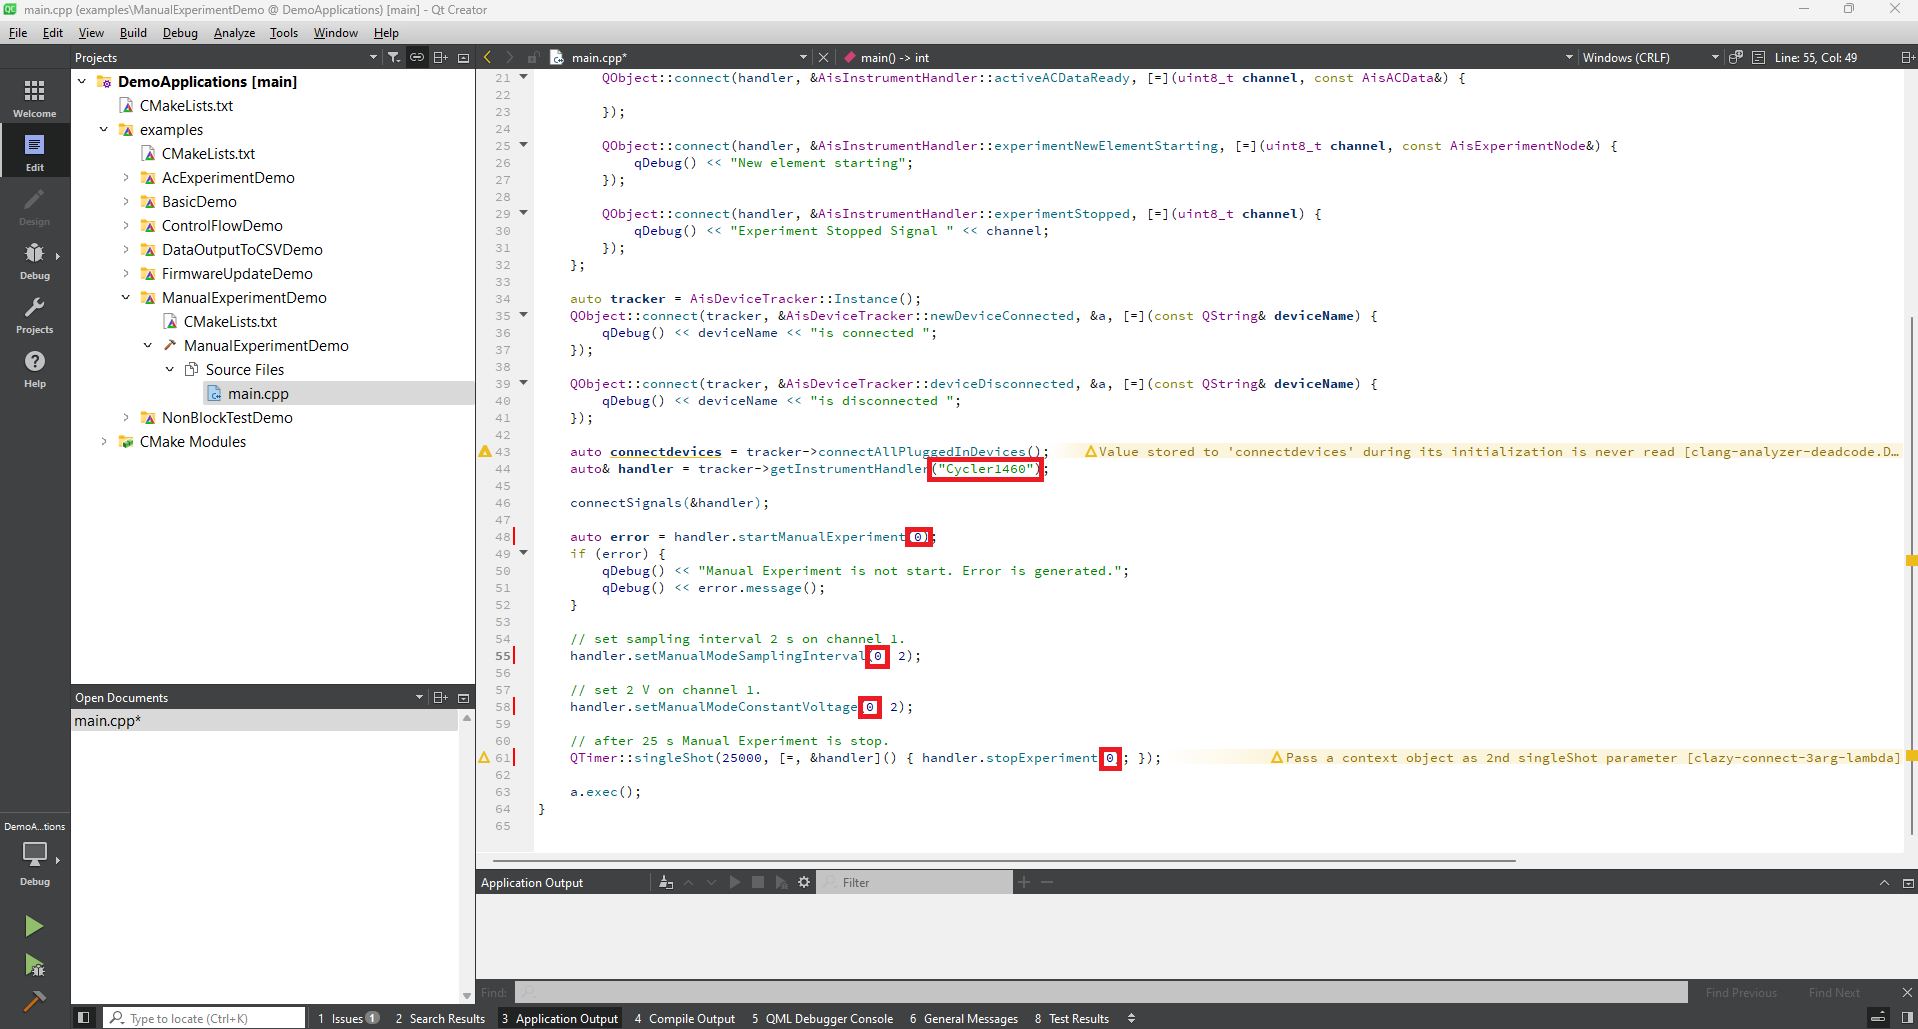
    Qt manual experiment code

  7. Select either Debug or Release mode according to your requirements and click on the run button to execute the manualExperimentDemo.
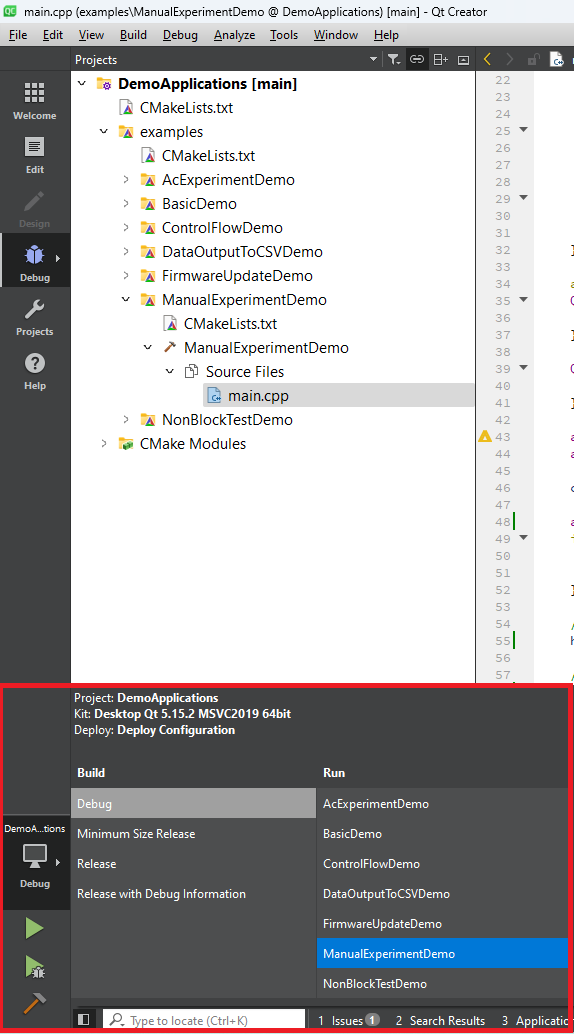
    Qt selection of Debug and Release

  8. You can view the output data from the manual experiment in the Application Output window.

    Qt output window